


In this short article, we are going to cover a simple tutorial on how to set up stripe with Spring boot using stripe java client. If you know about kotlin, you know that it is completely interoperable with java. Not the aim.
PermalinkRequirements:
- Stripe account - create one [here](stripe. com)
- Stripe test keys - Get them here
- The IDE of choice- I use Intellij
- Some knowledge of javascript
- Knowledge of spring boot
PermalinkTo get started:
- Go to spring initializr and set up a project there. You can skip this if you have an existing project.
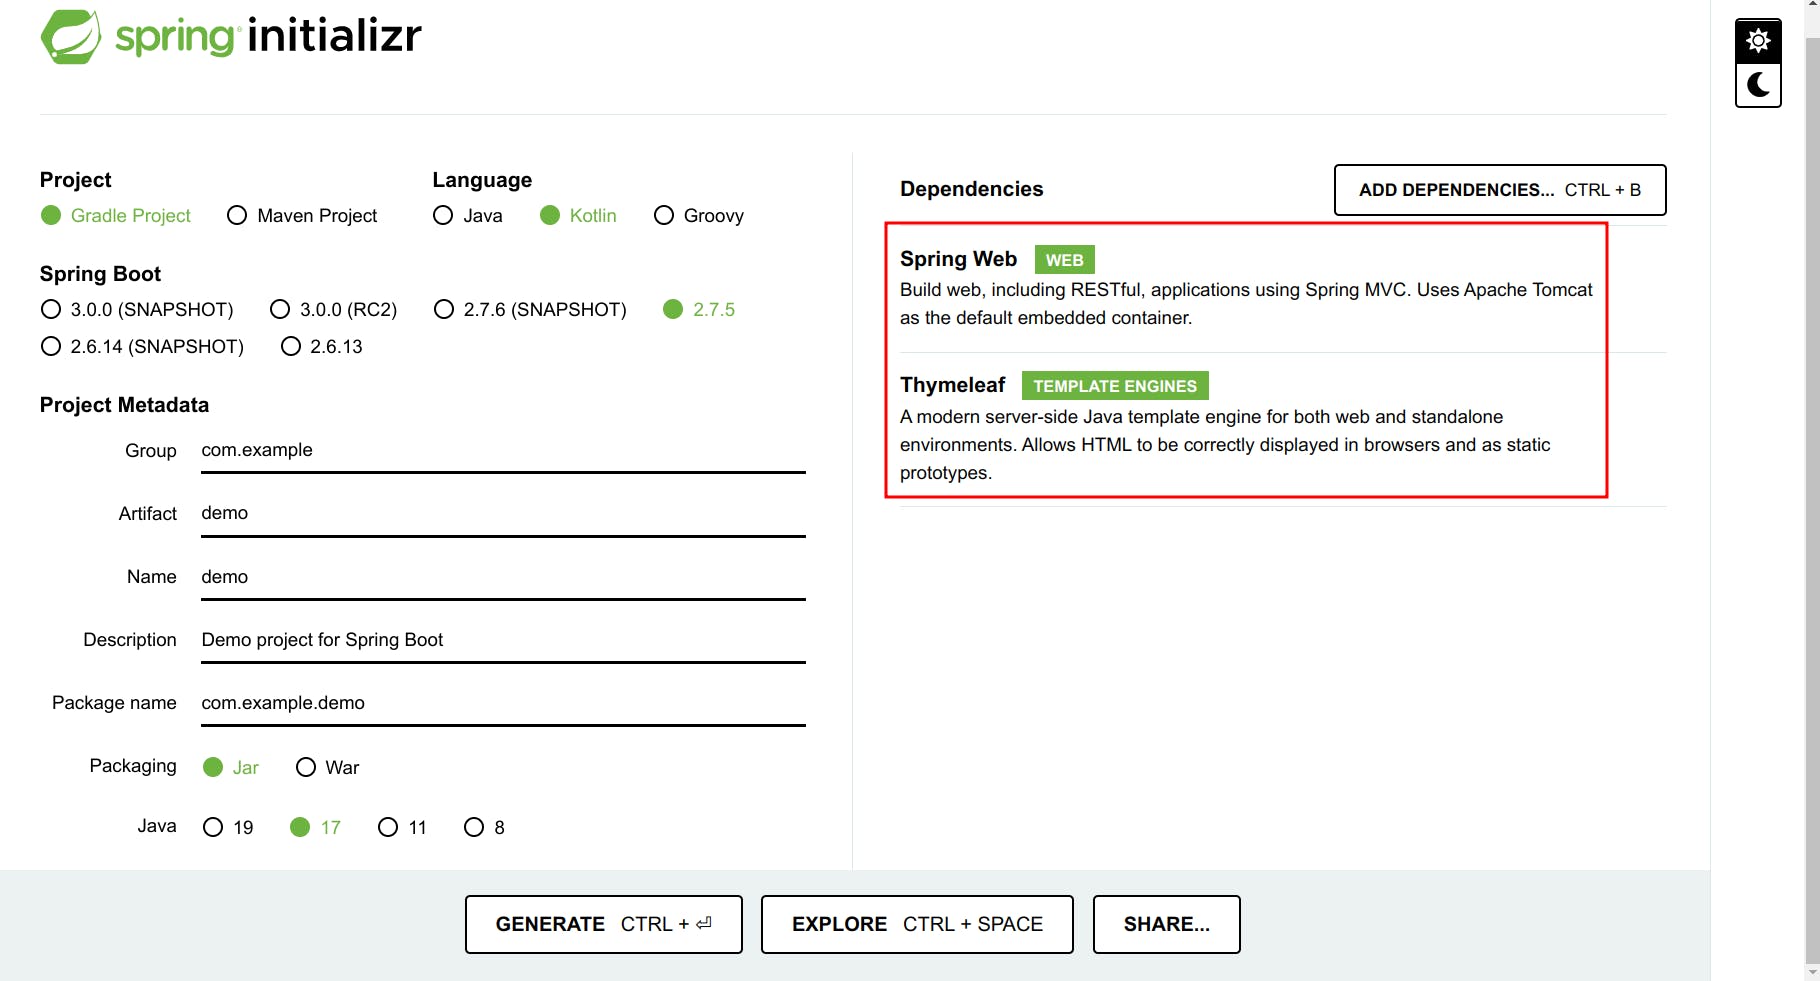
Make sure you added the needed dependencies highlighted above. To learn more you can check the spring.io website.
Load the project into the IDE of your choice and we can get started.
In your
gradle.build.ktsorgradle.buildadd the following line in the dependencies and run gradle sync/build --refresh dependencies
//gradle.build.kts

implementation("com.stripe:stripe-java:21.10.0")

//gradle.build

implementation "com.stripe:stripe-java:21.10.0"
Create controllers to serve the following purposes:
- Receive webhook events from stripe. Learn more about stripe webhooks here
- Create a payment intent - Payment intent are discussed here
- Serve a HTML form
A payment intent guides you through the process of collecting payment from your customer.
A webhook is an HTTP-based callback function that allows lightweight, event-driven communication between two APIs.
PermalinkCreate payment intent
- Create a simple form using the stripe form element in the
resources/templatesfolder and add the following script before the end of body
We will create client.js later:
<script type="text/javascript" th:src="@{/client.js}"></script>
- Add the following code at the head
<script src="https://js.stripe.com/v3/"></script>
Once your simple form is created, you can include name, email and any other information needed in case you need to do a refund and then create a card form using Stripe element mentioned above.
- In
resources/staticcreateclient.js
Add the following line to instantiate the Stripe object.
var stripe = Stripe(PUBLIC_KEY);
The next thing we need is a way to create a payment intent. We need to call an endpoint to create the payment intent(Needed to let stripe know about the payment that is being made).
This endpoint can be called when a user clicks the submit button to pay incase you need to know what event to use to trigger the call.
  const res = await  fetch('/create-payment-intent', {
    method: 'POST',
    headers: {'Content-Type': 'application/json',},
    body: JSON.stringify({
        amount: amount,
        paymentMethod: [paymentMethod],
        currency: currency,
    })
})
The response to this is a client secret that we will use to confirm payment. To create this endpoint we simply create a RestController that will use stripe to create the payment intent and return a payment secret.
    @PostMapping("/create-payment-intent")
    fun createPaymentIntent(@RequestBody payload: paymentPayload): Map<String, Any> {

//  set up your stripe secret key obtained from your stripe dashboard (https://dashboard.stripe.com/test/apikeys)

        Stripe.apiKey = STRIPE_API_KEY
        val paymentIntentParams = PaymentIntentCreateParams.builder()
                .setAmount(payload.amount?.toLong())
                .setCurrency(payload.currency)
                .addPaymentMethodType("card")
                .build()
        val paymentIntent = PaymentIntent.create(paymentIntentParams)
        return mapOf("clientSecret" to paymentIntent.clientSecret)
    }
}
Now we can create an intention to pay a certain amount using a certain payment method, for our case, card.
Next, we need to make the payment and confirm it.
PermalinkConfirm payment
To confirm the payment we simply need to add the following code to our javascript.
const paymentIntent = await stripe.confirmCardPayment(clientSecret, {
    payment_method: {
         card: card,
            billing_details: {
                name: name,
                email: email
            }
    }
}).then((result) => {
    if (result.error) {

      // Show error to your customer (e.g., insufficient funds)
      // The kind of error that could occur and how to ensure its updated.
      // https://stripe.com/docs/payments/accept-a-payment?platform=web&ui=elements#web-handle-errors
      console.log(result.error.message);

    } else {
      // The payment has been processed!
      if (result.paymentIntent.status === 'succeeded') {

        // Show a success message to your customer
        // There's a risk of the customer closing the window before callback
        // execution. Webhook is setup for that.('/webhook')
        // payment_intent.succeeded event that handles any business critical
        // post-payment actions.
      }
    }
    });

})
That is it. We pass the client secret and stripe processes the payment. This is done in the frontend. But what if we need to know if payment was successful?
Webhooks come into play. We need to set up a webhook that stripe communicates with to tell the backend what is going on with our payment.
We simply add the following code:
    @PostMapping("/webhook")
    fun handleWebhook(@RequestBody payload:String,  @RequestHeader("Stripe-Signature") sigHeader: String): String {

        var event: Event? = null
        try {
            event = Webhook.constructEvent(payload, sigHeader, endpointSecret)
        } catch (e: SignatureVerificationException) {
            // Invalid signature
            Logger.getLogger(PaymentController::class.java.name).warning("Invalid signature.")
            return ""
        }
        // Handle the event
        when (event.type) {


            "payment_intent.succeeded" -> {
                val paymentIntent = event.data as PaymentIntent
//            set up your logic to handle the payment intent once it is successful
                Logger.getLogger(PaymentController::class.java.name).info("PaymentIntent was successful.")
            }
            "payment_method.attached" -> {
                val paymentMethod = event.data as PaymentIntent
//            set up your logic to handle the payment method once it is attached
                Logger.getLogger(PaymentController::class.java.name).info("PaymentMethod was attached to a Customer.")
            }
            /*
            * Stripe has more intent methods that can be subscribed to. These are just a few of them.
            * For more on this read the stripe documentation on webhooks(https://stripe.com/docs/webhooks)
            * */

            else -> {

                Logger.getLogger(PaymentController::class.java.name).info("Unhandled event type: " + event.type)
            }
        }
        return ""
    }
And that is it. We can now also process the payments on the backend.
PermalinkResources:
- To get the code and run check here
Thanks for reading.